UI Testing with Eclipse Jubula: Specifying the Tests (2)
Last time, I prepared the Eclipse sample RCP mail application as a test object for Jubula. Today, I'll try specifying a few tests against it in Jubula. If you've missed the first part, you can find it here.
What's that about specifying tests? - Can't you just capture and replay them, perhaps? - Well, no, not with Jubula, and not with me, either! The reason is that test scripts created via Capture/Replay have lots of problems with maintainability and robustness. And when you try to refactor Capture/Replay scripts into a good automation, you'll notice that it's not easier than writing those scripts from scratch with modern test automation tools like Jubula.
Also, Capture/Replay is only possible after the test object already exists (which is normally too late in the lifecycle of a project), and it misleads you into adapting the tests to fit the current behaviour of the test object.
So, let's start up Jubula and begin specifying a few tests. After the welcome screen, Jubula greets you with the following prim perspective: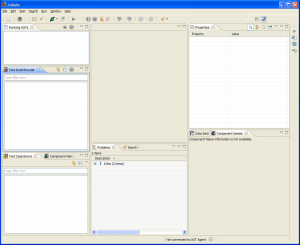
If you look at it very closely, you'll find a small hint about what to do next within the Problems view: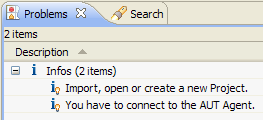
However, it doesn't tell you how to create a new project. Surprisingly, you won't find it in the File menu, but in the Test menu (Test/New...):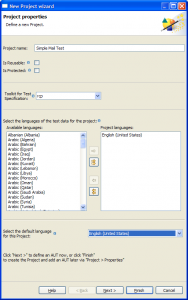
Choose "rcp" as toolkit, give your project a good name and click the "Next" button. Now you've got to tell Jubula about your test object (Jubula calls it "AUT" for "application under test"):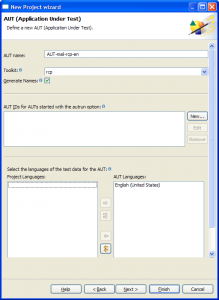
Choose a name for your test object and ensure, that the "rcp" toolkit is selected. Don't worry about AUT IDs for now. Press the "Next" button for the last step: configuring your test object: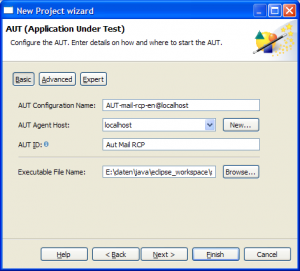
Give your configuration a good name, and set an "AUT ID" for it, too. But mainly, select the executable of your RCP application, then click "Finish". - At last, we're done with creating the test project.
Note (in the top right) that we've already got the correct perspective open: the "Functional Test Specification" perspective. When specifying tests in a top-down way, you'll at first mostly work with the "Test Case Browser" view (bottom left), with the editor pane, of course, and with the "Properties" view (top right).
To begin with, let's create two levels of abstraction for structuring our tests (for complex applications, you probably want more than two): "Use Cases" and "Basic Interactions". Create these as new categories in the Test Case Browser. Notice how the "Use Cases" gets sorted (alphabetically) after the system library test cases of your toolkit ("unbound modules..."). If you don't like that, you can always prefix your categories.
Let's test the opening of mail messages first. I created another category for that under the "Use Cases". What are our use cases for opening mail messages in that simple application? Well, we can open a message by menu, by keyboard shortcut or by toolbar button. And afterwards, we can check whether the "Open Message Dialog" appears correctly. That's it. Here are my test cases:
Alright, now we can open our first test case "Open Message via Menu" in an editor: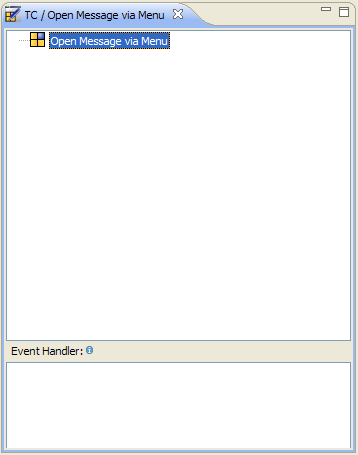
A lot of empty space to fill... - what are the basic interactions this test case consists of? I'd say we have to find and select the correct menu entry first, and then check for the dialog next. So let's create these two basic interactions (I already created the basic interactions for the other use case level test cases, too):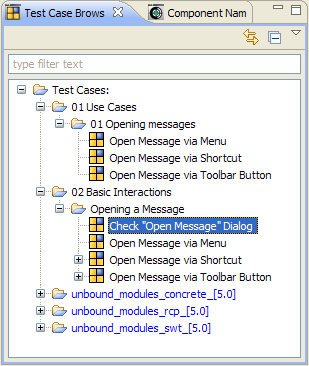
Now that we have declared the required basic interactions, we can drag and drop them into the editor, and even rename the references afterwards in the Properties view (not very necessary in this simple case, where there are no parameters, but in general, I'd always do that):
Up to now, we're still on an abstract level without any toolkit interactions. But that's going to change when we specify how our basic interactions work.
Let's start with opening the "File" / "Open Message" menu entry. We're looking for a way to select a menu bar entry. So, let's open up the "unbound_modules_concrete" tree in the Test Case Browser, and then look under "Actions (basic) / Select / Menu Bar / ub_mbr_selectEntry_byTextpath". That should be the right one. Drag it into the Test Case Editor of your basic interaction.
Nearly done. Now give it a good name in the "Properties" view, and set the two parameter values. The value for TEXTPATH should be /File/Open Message*, and the value for OPERATOR should be simple match (or you could do the same with matches and a proper regular expression in TEXTPATH).
Now your test case should look similar to this: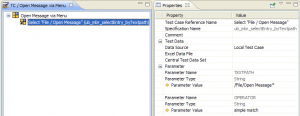
Next let's specify how to check the dialog: First, we want to wait until an "Open" dialog appears, then we want to check that it displays the correct text, and finally we want to close it again by pressing the "Ok" button. This means, that for this test case, we need a sequence.
So, find the basic concrete action "Wait / Application / Wait for Window / ub_app_waitForWindow" and add it to your test case. You now have to configure a few properties again, namely TITLE, OPERATOR, TIMEOUT_IN_MILLISECS and DELAY_AFTER_VISIBILITY: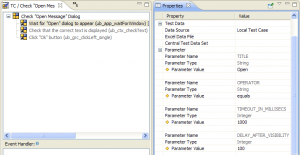
Then, find the action "Check / Component with Text / ub_ctx_checkText" and append it to your test case. Enter the parameter values as always. But now, there's something new to do. We have to tell Jubula the text of which component we want to check, and we do that in the "Component Names" view (in the lower right). In there, under "New Name", just enter an identifier that makes it easy for you to remember which component it is (I chose "open_message_dialog_text"):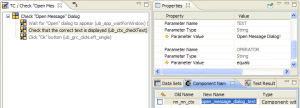
Later, when you want to execute your tests, you'll need to map these component identifiers to the physical components of your test object. This is called object mapping, but we'll handle that later on.
Alright. Now, only the button click is missing. It's in the basic actions category, too, under "Click" / "ub_grc_clickLeft_single". There's no properties to set this time (except for the reference name), but again, we have to tell Jubula that we want it applied to the "Ok" button of the dialog by telling it how we want to call our logical component (I chose "open_message_dialog_ok_button"):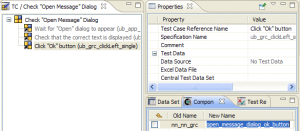
And finally, we're done with our first check.
I'll leave specifying the two other basic test cases "Open message via toolbar" and "Open message via shortcut", and filling in the two other use case level test cases to you, as an exercise. :)
When you're done, we can collect the fruits of our work in a test suite. Within the "Test Suite Browser", create a new test suite called "System Test" (for example), and open it in an editor. Now drag all your use cases into the test suite: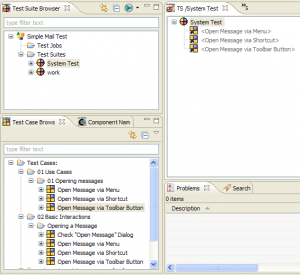
Don't worry if you see problems in the "Problems" view. They probably tell you that you haven't done the object mapping yet. - We're done specifying our tests, but we can't execute them yet!
And that means that there's more left to do in my next blog entry... :)